Showing posts with label Cookies. Show all posts

Monday, July 29, 2013

Chocolate Peanut Butter No-Bake Cookies

If you are one of All Things Delicious' Facebook fans, you may have seen my post about these cookies.  (Like the Facebook page HERE!)

As I mentioned on Facebook, we recently learned that one of my daughters has an intolerance to gluten and dairy.  It has been a major adjustment for us, but I'm slowing learning how to best help her have good food to eat.

When it comes to yummy treats that we usually make and enjoy on Sunday's, we usually turn to brownies, baked cookies, cakes, quick breads, and such...all things my daughter can no longer enjoy (well, at least for now).

But when one of my friends posted a picture of no-bake cookies on Facebook, I thought that would be something easy to adjust to fit our gluten-free and dairy-free needs as well as our cravings for something sweet.

They hit the spot.


This recipe is a cross between my mother-in-law's and my mom's recipes for no-bake cookies.  So simple and so delicious.

Here's what you'll need:

2 C. sugar
4 T. cocoa
1/2 C. margarine (or Earth's Best Vegan Buttery Sticks)
1/2 C. milk (or coconut milk or any other milk substitute)
1 C. peanut butter (creamy or chunky)
1 Tbsp. vanilla
3 C. oatmeal (old fashioned or quick cooking)
1 C. coconut (optional)

In a heavy saucepan, bring to a boil the sugar, cocoa, margarine, and milk.  Let boil for 2-3 minutes.

 
Remove from the heat and add the peanut butter, vanilla, oatmeal, and coconut (if desired).


Using a medium cookie scoop, place cookies on a parchment-lined cookie sheet.


Let cool until firm, approximately 20 minutes. 


I doubled the recipe so that we can put the extras in the freezer for the next time my little girl has a craving for something chocolate-y and sweet.

Tuesday, April 9, 2013

Chocolate Chip Caramel Cookie Bars

Yesterday I had a doctor's appointment.  It was with a new doctor and a new (to me) method of testing using electric pulses running through my body (none of which I could feel) giving readings of hundreds of systems in my body.  It was absolutely fascinating.

One of the results of this test showed that I have a high level of yeast in my body.  The doctor said that this can cause cravings for sweet things, which I most certainly do.  But I've always thought this was what you'd call a "sweet tooth."

He says that it's fixable.  I say, we'll see.

So in honor of my well-beloved "sweet tooth," today I'm posting an incredible recipe from Two Peas and Their Pod, of which I've slightly adapted.


Here's what you'll need:

4 1/4 C. flour
1 tsp. salt
1 tsp. baking soda
3 cubes (1 1/2 C.) butter, melted and cooled to room temperature
2 C. brown sugar, packed
1 C. granulated sugar
2 eggs
2 egg yolks
4 tsp. vanilla
4 C. chocolate chips
20 oz. caramel candy squares, unwrapped (approx. 78 caramels)
6 Tbsp. heavy cream

In a medium bowl, combine the flour, salt, and baking soda.  Set aside.

In the bowl of a stand mixer, mix the melted and cooled butter and sugars together until combined.


Add the eggs, yolks, and vanilla and mix until smooth. 


Slowly add the dry ingredients and mix on low, just until combined.  Stir in the chocolate chips.


In a large microwave-safe bowl, combine the caramels and heavy cream.  Microwave on High until caramels are melted, stirring every 30 seconds.  This takes about 2 minutes, depending on your microwave.


Divide the cookie dough in half.  Press half of the cookie dough into a large, high rimmed pan that's been sprayed with baking spray that has flour in it.

*The first time I made these I used my regular half-sheet pan which has 1-inch sides.  From now on I will make these in my half-sheet pan that has 2-inch sides.*


Pour hot caramel over the cookie dough.


 Crumble remaining cookie dough over the caramel and lightly press.


Bake at 325 degrees for approximately 40 minutes or until the top of the bars are a light golden brown.  Cool bars on a wire rack to room temperature.  


As you can see, the caramel oozes out over the sides using a pan with 1-inch sides.


Kind of messy in the oven.


But they're PERFECT in a pan with 2-inch sides!


Cut off the edges then cut bars into squares and serve.


You can half this recipe and make them in a 7"x11" or a 9"x13" pan.  But for every occasion I've made these for, a high-rimmed half-sheet pan (13"x18"), is finished off in no time at all.

Tuesday, February 5, 2013

Chocolate Chip Cookie Dough Brownies

Oh, boy, folks!  What a week it's been around here.  I've been trying all sorts of new recipes and, wowie, we've found some good ones!  Today's recipe is one that I made for the Super Bowl party we were invited to.  It was a big hit according to everyone there.

Just try to wrap your head around this...

Chocolate chip cookie dough
(the egg-less kind, so it's safe for anyone to eat)

AND

Brownies

This is what you get:


Wow, wow, WOW!!  They were so good!  The original recipe comes from Recipe Girl and I'm so thankful she shared it.  It's now one of my top faves.

Now, there are some things about this recipe that you should know.  They take a little time.  You make the brownies and then they have to chill.  Later, you top them with the cookie dough, then let them chill.  When I made this, I made it Saturday and let them chill in the fridge until Sunday.

You should also know that the top part of these goodies is cookie dough (with no eggs, once again).  Cookie dough is grainy until you bake it.  This cookie dough you do not bake.  So, it will be grainy.

Now go and make these delicious squares of awesomeness.

Here's what you'll need:

Brownie Layer:
3/4 C. unsalted butter
1 1/2 C. semi-sweet chocolate chips
1 C. white granulated sugar
1/2 C. packed brown sugar
4 large eggs
1 tsp. vanilla
1/2 tsp. salt
1 C. flour

Cookie Dough:
3/4 C. unsalted butter, room temp
3/4 C. white granulated sugar
3/4 C. packed brown sugar
1/4 tsp. salt
2 Tbsp. milk or cream
1 1/2 tsp. vanilla
1 C. flour
1/2 C. mini chocolate chips
Additional mini chocolate chips, if desired to garnish the top

Making the Brownies:
Preheat the oven to 350 degrees.  Spray a 9x13-inch pan with nonstick spray.  In a microwave safe bowl, microwave the butter and chocolate chips on High for 30-second increments until the chocolate and butter is melted and smooth.

Beat in the sugars.


Then beat in the eggs, vanilla, and salt.


Beat in the flour.


Scrape the brownie batter into the prepared pan.


Bake for 25-30 minutes, or until the brownies are cooked through and a toothpick inserted into the center comes out clean.

I doubled this whole recipe since I was making this for a crowd.  I put it in my high-rimmed cookie sheet and had to bake it for 35-40 minutes.


Once the pan has cooled enough, put it in the refrigerator to chill.  While the brownies are chilling, make your cookie dough.

Making the Cookie Dough:
In a large bowl, cream the butter, sugars, and salt, about 1 or 2 minutes.


Mix in the milk or cream and vanilla.


Add the flour and beat until combined.


Add the chocolate chips.


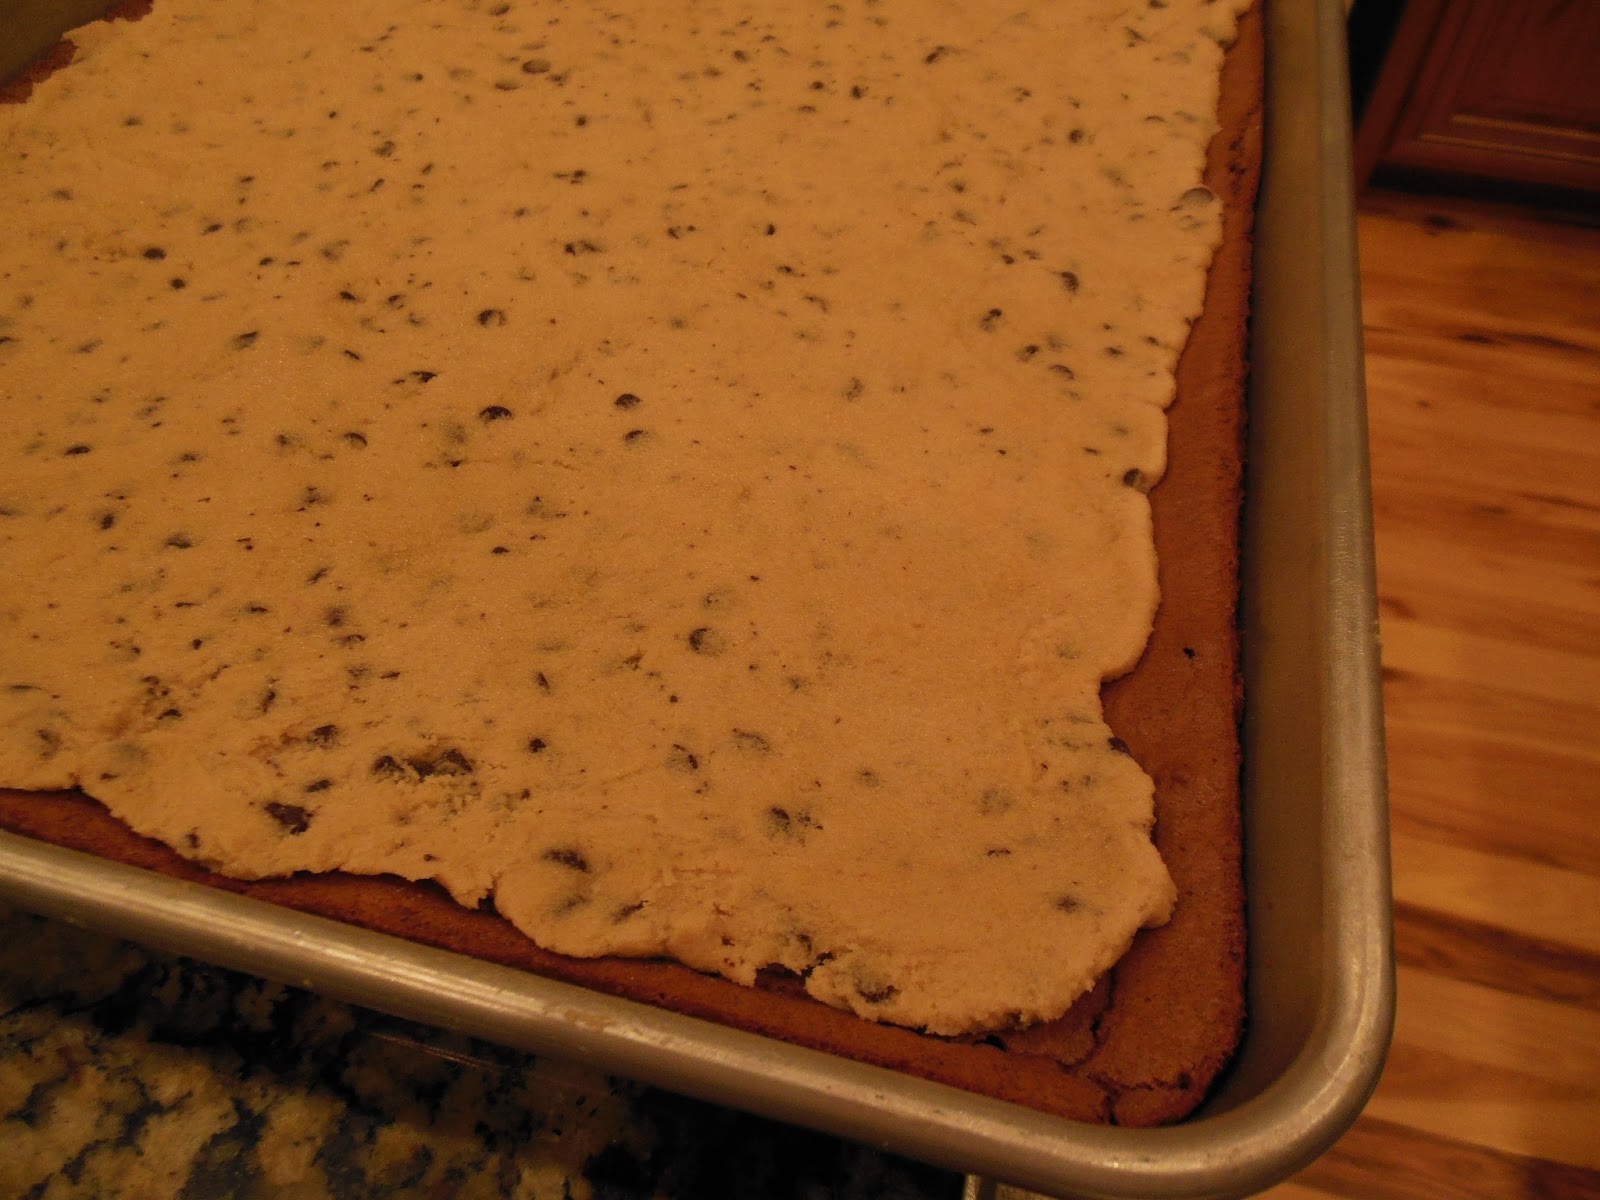
Once the brownies have chilled. Scoop the cookie dough on top of the brownies.


Spray your hands with nonstick spray and press the cookie dough so that it covers most of the brownies.


You may add additional mini chocolate chips on top at this point if you'd like.


Cover and refrigerate for at least an hour or two or up to 2 days.

Cut, then keep covered and chilled until ready to serve.


I highly recommend serving this with a tall glass of milk, or even a couple scoops of vanilla ice cream.
HELLO!!  So good!

Wednesday, June 20, 2012

Cookie Brownie Bites

*Two posts in one day!  I am on a roll!!  Continue reading the next post to see the fun cake we had yesterday.*


I hosted a party last week for my friends, and of course, I have to have fun, yummy food to serve!

I found this idea on Pintrest a while ago and have made them twice since.  Now that says a lot coming from me, who doesn't like to make the same thing twice in a short period of time.

These yummy treats are SUPER simple to make and SO fun to eat!!


Here's what you'll need:

2 tubes refrigerated chocolate chip cookie dough
1 pkg. Oreos
1 pkg. brownie mix, made according to package instructions

I have mini cheesecake pans that I used for these, but you can also make them a little bigger by using a muffin tin.  Or you could make them smaller with a mini muffin pan and use the mini Oreos.  Those would be super cute!

Step 1:
Press cookie dough into the bottom of your greased pans.

Step 2:
Top with an Oreo (or you could try a Reese's Peanut Butter Cup).

Step 3:
Cover Oreo with prepared brownie batter.

Step 4:
Bake at 350 degrees for 15-18 minutes depending on whether you use these sized pans or muffin pans.  Mini muffin pans would be for less time.  Basically just bake until the brownie batter looks baked.

Step 5:
Remove from the pan(s) and allow to cool on a cooling rack.

(Steps 1-3 shown here)


How easy is that?!  Enjoy!!!

Thursday, December 8, 2011

Snickerdoodles

After posting about the baby shower that I hosted, I had LOTS of people ask for my Snickerdoodle recipe, the only recipe I didn't post.  So when I was co-hosting the annual cookie exchange, I decided to make these Snickerdoodles again, and this time, take some pictures of the process to share with all of you!
                                     
This recipe comes from one of my Lion House cookbooks, just like my favorite Chocolate Chip Cookies do.  Some of my friends who are true Snickerdoodle lovers say that these are some of the best they've had. I hope you like them too!

Here's what you'll need:

1/2 C. sugar
1 1/8 tsp. cinnamon
1 C. butter, softened
2 1/2 C. sugar
4 eggs
1 tsp. vanilla
2 1/2 Tbsp. water
6 C. flour
2 tsp. cream of tartar
1 tsp. baking soda
1/2 tsp. salt

In a medium bowl, mix 1/2 C. sugar and cinnamon; set aside. (You can half this cinnamon sugar or you can make the full amount and save the extras for anything that could use some cinnamon sugar.)


  In a large mixing bowl, combine butter and 2 1/2 C. sugar until light and fluffy.


Add eggs, vanilla, and water; beat until fluffy.


Add flour, cram of tartar, baking soda, and salt, turning mixer on and off in quick bursts at low speed until flour is nearly blended in. (This is to help not have a flour explosion all over your counter.)  Continue mixing at medium speed until well mixed.


Shape dough by rounded tablespoonfuls (I used a medium cookie scoop and then rolled each ball in my hands).


Roll in cinnamon-sugar mixture.


Place on a cookie sheet and bake at 350 degrees for 11-12 minutes or 9-10 minutes with a convection oven.


The cookies that I baked on convection turn out like these, thicker and puffier.  When I bake them with my regular oven, they turn out a bit flatter with slightly more spread.  Both ways were tender and delicious.


Christmas is nearing!  What cookies do you like to make over the holiday season?
Related Posts Plugin for WordPress, Blogger...